


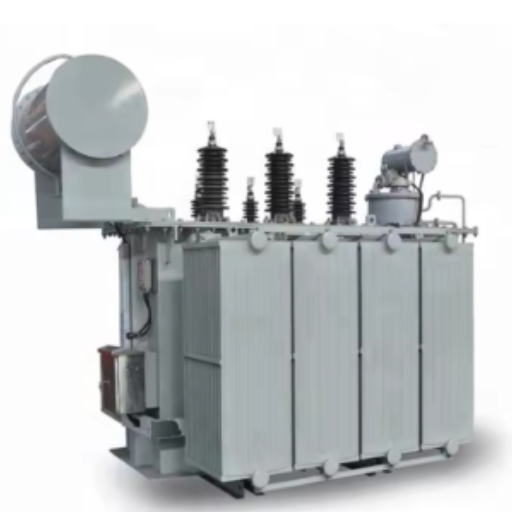


In the world of facility management, optimum humidity levels must be maintained to preserve equipment, maintain air quality and protect the integrity of the structure. Commercial dehumidifiers are central to this but many users overlook maintaining them to increase their lifespan and improve their operational efficiency. This article looks at some important maintenance tips that will enhance your dehumidifier’s performance and lead to significant cost savings over time. Facility managers can establish an unchanging environment that is dependable for several commercial activities by reviewing how these gadgets work and developing a maintenance system.
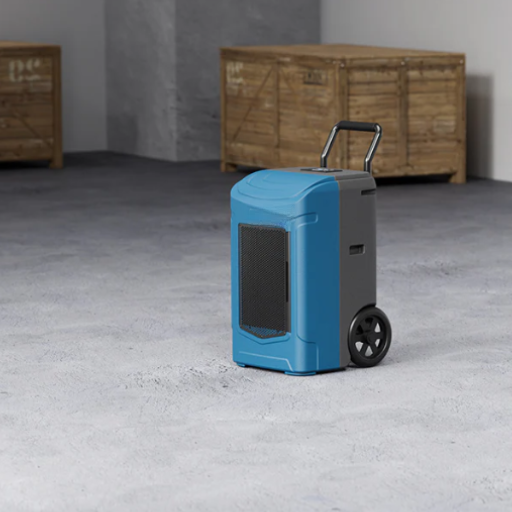
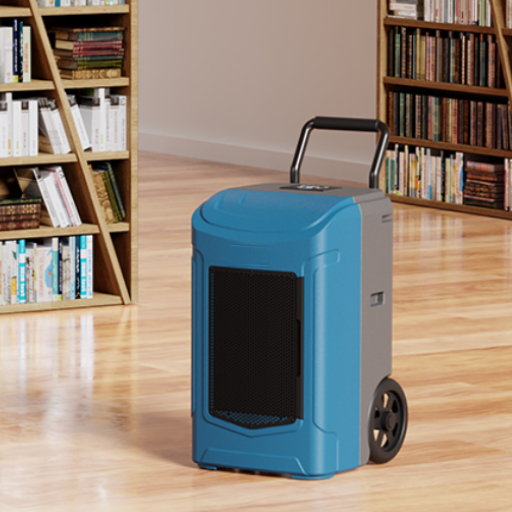
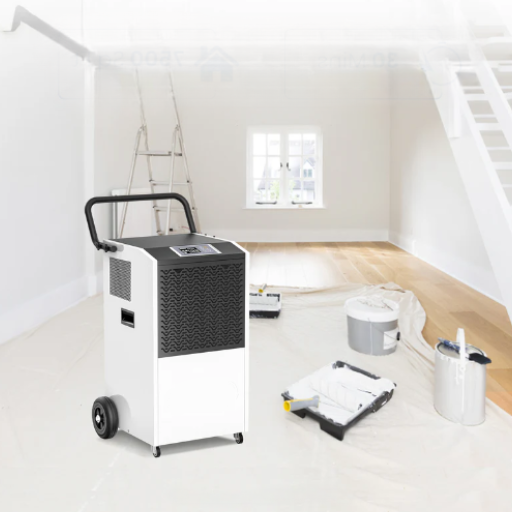
How to Properly Maintain Your Commercial Dehumidifier?
Why is Regular Dehumidifier Maintenance Crucial?
Commercial dehumidifiers must regularly undergo maintenance due to various reasons. First, it enhances operational efficiency so as to enable it to function at peak performance, which is essential in maintaining desired humidity levels. Mold growth, equipment breakdowns, and structural damage can all be prevented with properly functioning dehumidifiers which can effectively remove excess moisture from the atmosphere. Additionally, regular checks on filters, drain lines cleaning, and coil inspections help facility management avoid costly repair works and early replacements. Lastly, scheduled servicing improves energy conservation; when a dehumidifier works correctly, it consumes less energy, thus lowering operation costs. In conclusion, vigilant maintenance not only guarantees the length of service of machines and their effectiveness but also acts as an important stage towards maintaining the general soundness of the building itself.
How to Keep your Dehumidifier Working Efficiently
To ensure that your commercial dehumidifier is running at its maximum efficiency, follow these guidelines:
- Change Filters Regularly: Filters should be inspected monthly depending on usage and air quality. A blockage or dirt accumulation may obstruct weather, forcing this system in order to work much more difficult and also reduce of the equipment. For optimal dehumidification, a clean filter maintains airflow rates about 300-400 CFM (Cubic Feet per Minute).
- Clean Condenser Coils: Dust and debris on the coils can affect heat exchange efficiency. This process must be performed every six months throughout the year. For efficient moisture removal, maintain coil temperatures between 65°F and 80°F—coils outside this range may imply operational inefficiencies.
- Check Drain Lines: Make sure that drain lines are free of obstructions. Standing water and pump failure will result in system failure for units employing an internal condensate pump. Inspect drain lines every quarter for proper pitch and obstructions.
- Monitor Humidity Levels: Humidity levels within the facility can be monitored using a hygrometer. Typically, relative humidity settings for commercial spaces fall between 40% and 60%. Keeping humidity within that range during good-humidity operation of the unit can minimize excessive wear patterns.
- Ensure Proper Airflow: Adequate space should be left around the dehumidifier for intake and exhaust, thereby maintaining proper airflow inside it. At least 12 inches is recommended for all sides’ clearance to prevent overheating.
- Use the Humidity Control Settings: Many modern dehumidifiers are manufactured with programmable settings that adjust operating levels based on real-time environmental conditions. These settings can achieve energy savings of up to 15% while maintaining performance.
This way not only extends life span of dehumidifier but also helps to maintain the ideal humidity levels in commercial spaces, promoting operational stability and preserving property integrity.
How do I Need to Clean Expensive Parts of the Air Conditioner?
To begin, I always make sure that the machine is not connected to any electricity for security purposes. Then, remove the water tank and cleanse it with hot soapy water to get rid of germs and molds. After which, soften dirt in the filter by using a vacuum cleaner or rinsing it under running water then leaving it until it dries completely.
Next, I slowly clean off dust from the insides using a cloth soaked in vinegar mixed with some water on these internal coils. I also ensure that there are no rubbish fragments present in the fan and other parts. Finally, I plug in the unit after making sure all things are joined again and dry, then turn it on to test if it functions normally. Proper servicing not only improves its efficacy but also extends its lifespan, thereby enhancing the peak performance of this device.
How to Clean and Inspect the Coils of a Dehumidifier?

Instructions to Keep Coils Clean Safely
My first step is always to disconnect and power off the dehumidifier so that I do not expose myself to electric dangers. Following, I take off the cover or access panel, which may necessitate a screwdriver and exposes me to the coils. I use a soft brush or a vacuum cleaner with a brush attachment to meticulously eliminate dust and debris that has gathered on these coils, being careful not to damage delicate fins. If I need more than that, I apply an evaporator coil cleaner: make sure you closely adhere to all of the manufacturer’s instructions for this product. Then, after waiting for enough time as per its recommendations, I wash it down gently with fresh water without leaving any residue behind after rinsing. The final stage is when I leave the cleaned-up coils open until they have completely dried before reassembling them back into the unit. Lastly, when plugged in and turned on at low speed for several minutes, check if airflow is free from obstructions and whether the system is running normally again. Regularly cleaning these wires will help increase dehumidifier efficiency and result in better moisture control conditions.
Equipment Required For Cleaning Coils
To properly clean the coils of a dehumidifier unit, I have some important tools that include; Phillips screwdrivers used in removing access panels; soft brushes or vacuum cleaners fitted with brush attachments used for light dusting; evaporator or condenser coil cleaners which are specifically formulated; spray bottle containing water (to rinse cleaned coils), microfiber cloth that can absorb water well (to dry surfaces). It is also recommended to put on protective gloves as well as safety goggles when cleaning agents are being handled alongside debris removal activity. By gathering these items together, therefore, it becomes possible for me to carry out a proper cleanup process that maintains the efficiency of my humidifier.
How Frequent Should You Check The Coils?
From my past experiences, I suggest inspecting your dehumidifier coils at least once in every third month for best results. However, I find it helpful to have a look at them every month in areas with more humidity or dust build-up. With this frequency, I can notice any dirt accumulation right from the start that may cause serious performance issues with the unit. Additionally, whenever there seem to be some changes in either humidity regulation or airflow, I will just look at the wires themselves before anything else. By doing this, not only does it make the device function optimally but also prolongs its life by identifying problems early enough.
What are the Best Practices for Changing the Air Filter?
How to Clean Your Dehumidifier Filter
To clean my dehumidifier’s air filter effectively, I use a systematic approach that also ensures I can reuse it and keep the unit running efficiently. After unplugging the device from its power source for safety reasons, I find the filter, which is usually located behind the front grille or access panel.
I handle it carefully while removing it, ensuring I note its orientation for later reinstallation. Examination follows in which I check whether there is any dust or damage on it. Before washing, I normally employ a vacuum cleaner fitted with a soft brush attachment to eliminate most loose debris without harming its material. This is very important because excessive force can lead to filter bursting or even reduced efficiency.
The next step after vacuuming involves preparing a mixture of warm water and mild soap. Submerged in this solution, the filter should be gently scrubbed using either a soft sponge or cloth to eliminate dirt and odors embedded into it. Also, depending on the filtration type, I may have to consult my manufacturer’s cleaning product specifications to avoid using abrasive solutions. Remove all traces of remaining soap suds and avoid any other kind of chemical contamination to airflow is achieved by thoroughly rinsing my newly cleaned filter under running water.
Then, dry out your filter completely by placing it on a clean surface or blotting away excess moisture with a microfiber cloth. It’s important for your filter to be absolutely dry since any moisture left will cause mold development, leading to poor indoor air quality (IAQ). Still dry, put back your dehumidifier’s air filters, observing their proper orientation as noted earlier, followed by plugging in for power connection purposes only, then switch on the power supply again. This careful cleaning helps improve indoor air and optimizes the dehumidifier’s performance, guaranteeing that the filters remain functional for much longer than expected. Typically, once every 1 – 3 months, I clean the filter depending on its use and location.
When to Replace the Air Filter?
From my experience, replacing an air filter is usually influenced by several factors such as the kind of filter, frequency of use and environmental conditions. For normal pleated filters, I would strongly suggest that they get replaced every six to twelve months in general. However, in homes with pets, allergy sufferers, or high levels of dust, it becomes wise to replace it every three to six months so as to keep on with a healthy air quality. Moreover, I also check its status during regular cleaning exercises whereby if I notice substantial discoloration or heavy buildup that cleaning cannot handle then I quickly opt for a change in order for the dehumidifier work efficiently and effectively.In addition, after using heavy or seasonal transitions, getting them checked can be advantageous since they can show an early change is needed.
Signs that Your Air Filter Needs Replacement
According to my practice several key indicators say when an air filter should be changed. Most importantly, I assess airflow; a reduction in it may suggest blockage, hence clogging, which undermines the system’s efficient operation. Furthermore, hearing unusual sounds originating from the dehumidifier suggests that there could be resistance due obstructions. In addition to this, any unpleasant odors such filters might have meant that allergy-causing substances are located inside them. In sum, during regular inspections I look out for damage or discoloration on the filter where grey or too much dirt shows it has to be substituted. Finally increased energy bills need attention because efficiency can go down if there is a problem with your filer making you pay more electricity bill than usual.Based on these signs,I optimize performance and maintain…
How to Address Issues with the Compressor in Your Dehumidifier?
Common Problems with Compressors
In my opinion, most of the problems that affect the compressors in everyday life are inadequate cooling, unusual sounds coming from them or cycling problems. One common problem is a faulty starting capacitor that inhibits compressor start-up. While the standard capacitor rating can vary, I point out that an average compressor may require 5 to 50 micro farads (μF) as a starting capacitor. A bad capacitor would mean that instead of turning on, I notice that the compressor is straining and it experiences more wear and tear; hence, overheating becomes possible.
Another case to consider is refrigerant leakage. The compressor may function at low efficiency levels if the refrigerant drops below the manufacturer’s recommended limits, which are approximately about 60-70 psi on the low side and 150-250 psi on the high side when operational. From time to time, while performing these activities, I have found it necessary to check these parameters so as to maintain optimal refrigerant pressure.
Additionally, what concerns me here is an overload protector malfunctioning on a compressor. Frequent tripping could indicate overheating due to reduced airflow or low refrigerant levels. It is important for air flow lines not to be blocked and constant observation made because ambient temperature should range from 50°F up to 85°F to yield better performance.
Also any weird noises like grinding or rattling suggest internal mechanical faultiness usually occurs within such type of equipment. With this in mind, I always evaluate vibrations during running along with audible signals that might indicate worn bearing replacements requiring immediate attention from professionals before the entire system breaks down completely. Through awareness plus technical know-how applied towards these ordinary malfunctions, I am able to achieve long life for dehumidifiers’ compressors.
How to Troubleshoot a Faulty Compressor?
In troubleshooting a faulty compressor, I strictly adhere to the procedure in order to establish the cause as accurately as possible. First, I look at power supply; I can ascertain that the compressor is receiving proper voltage if it is approximately 10% of what it should normally be as indicated on its nameplate. Also, using an ohmmeter, I measure the voltage across the terminals.
Next, I investigate starting capacitors that range between 5-50 μF, as noted earlier. The magnitude of capacitance for the unit under study and that given by the manufacturer must be comparable, if not equal. This suggests that if the readout is much lower than the expected value, then there is a problem with this particular capacitor. Alternatively, examining for signs of leakage or bulging could help us decide whether or not they are defective.
Then refrigerant levels and pressures are evaluated. During operation, when my gauge set is connected to the system and the low side pressure ranges between 60-70 psi, whereas the high side falls within 150-250 psi, everything is functioning correctly. On such occasions, it would make me think about oil seepage and will engage in the search for residue patches indicative of refrigerant leaks along refrigerant lines inside condenser coils/evaporator coils or service ports.
The overload protector’s resetting activity following tripping also provides an indication of its functionality. Regular trips question factors such as blocked discharge paths or dirty air filters, leading to inadequate airflow around compressor chambers. Free flow of air must be maintained, hence removing any obstacles from intake and outtake points on ventilators.
Finally, any unusual noises emitted during the running period indicate problems with the compressor itself: A vibration analysis tool helps assess amplitude and frequency of vibrational motion produced by it As worn bearing may show abnormal behavior in terms of vibration patterns then these defects should corrected with immediate effect since system failure may result.
This troubleshooting process is, therefore, designed to be followed sequentially. Accurate measurements and data collected will help me detect any problems with the compressor, hence maintaining its high performance and the efficiency of the entire HVAC system.
Maintenance Tips to Prevent Air Compressor Breakdown
To ensure the longevity and efficiency of the air compressor, I implement a holistic maintenance strategy that is focused on key operational parameters. Firstly, I create a routine plan for cleaning or replacing air filters for clogged filters may impair airflow immensely and burden the compressor. Besides, I examine an HVAC system’s condenser and evaporator coils in order to remove any accumulated dirt that might interfere with proper heat exchange.
I also emphasize maintaining refrigerant levels within appropriate limits as specified by manufacturers. Periodic leakage checks not only help keep system performance high but also prevent further damage. Additionally, I regularly analyze electrical connections and terminals for signs of corrosion or wear, correcting loosely fitted ones so that voltage drops do not affect the work of compressors.
Lastly, correct sizing must be ensured; too small or extremely large systems operate uneconomically, leading to premature compressor failure. Adhering to these maintenance tips can help reduce the risk of HVAC failure due to malfunctioned compressors by a great margin and improve its dependability.
Why is the Condensate Bucket Important and How to Maintain It?
What Is Involved in Cleaning and Emptying the Condensate Bucket?
In my experience, maintaining condensation buckets is important to prevent water damage and ensure proper functioning of the HVAC system. I begin by switching off the HVAC equipment for safety purposes before cleaning. Then, I find where the condensate bucket is usually situated, near the air handling unit or the furnace.
When I get access to the bucket, I carefully remove it from its housing without leaving any drops of water. I pour out into a suitable drainage container to avoid overflows during emptying. After this step, I check whether there are marks of algae or mould on my bucket since dirty residue may grow them due to stagnant water. Also, warm soapy water does a good job in washing inside while persistent grits are being scrubbed away. Moreover, vinegar mixed with 1 cup per gallon of hot water is applied to interior surfaces before rinsing thoroughly as a powerful inhibitor against microbial growth.
Additionally, I make sure that float switch – an essential component responsible for turning on HVAC systems when there is excess water – works fine. Usually, this means ensuring that floats move freely and checking for any drains clogging, which can affect performance negatively. Regularly maintaining these parameters helps avoid backup and ensures the effective operation of the condensate system. This cleaning process should be done at least once every season if not more often in areas with more dust particles or higher humidity levels.
Preventing Mold and Mildew in the Condensate Bucket
To effectively prevent mold and mildew in the condensate bucket, I implement a multi-faceted approach based on best practices from industry-leading resources. First, I ensure that the bucket is cleaned regularly, as outlined in the previous section, to eliminate stagnant water, which serves as a breeding ground for microbial growth. Following the recommended dilution, I pour one cup of bleach into the condensate water to prevent organism proliferation without harming appliance parts.
I also consider installing a UV light system near the condensate drain because this technology has been found to greatly decrease microbial populations in water systems. Regular inspection of HVAC drain lines to ascertain that there are no clogs and ensuring optimal airflow through the system are important aspects that I use to enhance performance and reduce chances of accumulation. Finally, my seasonal maintenance checklist includes such preventive measures to be thorough and consistent about how it prevents mold and mildew in the condensate bucket.
Using a Drain Hose to Avoid Manual Emptying
Utilizing a drain hose as part of the condensate management system is a pivotal strategy to mitigate manual emptying of the condensate bucket. In practice, I fit flexible corrosion-resistant drain hose directly from the condensation pump into floor drains or external outlets where applicable. This configuration allows for continuous withdrawal of condensed moisture, hence reducing human intervention several times, thereby reducing incidents of overflow leading to flooding and molds.
I ensure that my hose is sloped downward with proper grading for efficient drainage without any low spots that may retain water. Furthermore, I include check valve while fitting it such that backflow is prevented which makes all collected moisture leave only going out of the bucket . It’s critical to also check for any kinks on the tube or logjams blockages or leakage areas; keeping under the manufacturer’s maintenance specifications guarantees better performance at all times. By doing it this way, I am able to achieve better overall efficiency of HVAC and minimize its maintenance requirements while keeping the system intact.
Reference sources
-
Moisture Cure Commercial-Maintenance and Best Practices for Commercial Dehumidifiers
-
Moiswell Blog-Maintenance Tips for Prolonging the Lifespan of Your Commercial Dehumidifier
-
Sylvane-Maintaining Your Dehumidifier
Frequently Asked Questions (FAQs)
Q: What are the primary benefits of using a heavy-duty commercial dehumidifier?
A: Heavy-duty commercial dehumidifiers are efficient in removing excessive amounts of moisture from the air, thus maintaining favorable indoor conditions and protecting against mold growth. They come in handy for maintaining a high-quality indoor atmosphere and safeguarding against water-related problems in huge industrial spaces such as warehouses.
Q: How does an industrial dehumidifier differ from a regular humidifier?
A: Industrial dehumidifiers are constructed to handle much larger spaces and higher levels of humidity than average humidifiers can cope with. They are built to withstand harsh environments and can remove high amounts of moisture from the air, making them suitable for warehouses and other types of commercial buildings.
Q: What should I consider regarding the air intake and exhaust when installing a commercial dehumidifier?
A: When installing a commercial dehumidifier, it’s important to ensure that there is sufficient space around air intake and exhaust grilles so as not to short-cycle it or prevent its optimal functioning. Doing this will help your system run smoothly without premature wear on the unit.
Q: How can regular maintenance impact the longevity of my commercial dehumidifier?
A: Regular maintenance, such as cleaning air filters, removing dust and debris, and inspecting exhaust grilles, is crucial in increasing the life span of your dehumidifier. This guarantees that the device works effectively, hence reducing the chances of breakdowns.
Q: What steps should I take to ensure my dehumidifier operates optimally?
A: To ensure your dehumidifier operates at optimal performance, regularly clean the air intakes, check humidistat settings, and perform routine maintenance. Also, learn how to clean the water collection bucket by accessing internal components to remove dust and debris.
Q: How do I handle the build-up of condensation in my dehumidifier?
A: To handle the condensation build-up, regularly empty the collection bucket and inspect the unit for any signs of water leakage. Also ensure that the vacuum system is working properly to keep off any water damage and maintain the indoor air quality.
Q: Why is it important to unplug the dehumidifier minutes before turning it off?
A: Unplugging a dehumidifier a few minutes before switching it off helps reduce electric shock hazards and allows the appliance to cool down. This should always be observed so as not to compromise your machine’s life or safety precautions.
Q: How can I improve the indoor air quality using a dehumidifier?
A: Using a dehumidifier can greatly improve air quality in doors by reducing humidity, preventing mold growth, and extracting excess moisture from the atmosphere. This results in a healthier indoor environment, translating into fewer cases of respiratory complications.
Q: What is the role of a humidistat in a commercial dehumidifier?
A: A humidistat controls indoor humidity by activating a dehumidifier whenever relative humidity exceeds certain preset levels. Thus, this device enables energy efficiency by ensuring that moisture removal only occurs when necessary, providing proper conditions for living.